Master the Flavor: Your Guide to Perfect Caramelized Onion Dip
There are party appetizers, and then there’s homemade French onion dip. This isn't just another dip; it's a culinary experience that elevates any gathering from casual to unforgettable. Forget those lackluster, artificially flavored tubs from the grocery store. We're diving deep into crafting an ultra-creamy, herb-layered, and deeply flavorful French onion dip that consistently vanishes within minutes, leaving behind only satisfied smiles.
For decades, French onion dip has reigned supreme as a party staple. But the secret to its enduring popularity isn't just its comforting familiarity; it's the magical transformation of simple onions into sweet, golden perfection. This guide will walk you through every step, from mastering the art of caramelization to blending the perfect creamy base, ensuring your homemade version is exponentially better than anything you've ever bought.
Why Homemade French Onion Dip Always Wins
The allure of homemade French onion dip is multifaceted. Beyond the sheer satisfaction of creating something delicious from scratch, there are tangible benefits that put it leagues ahead of its store-bought counterparts:
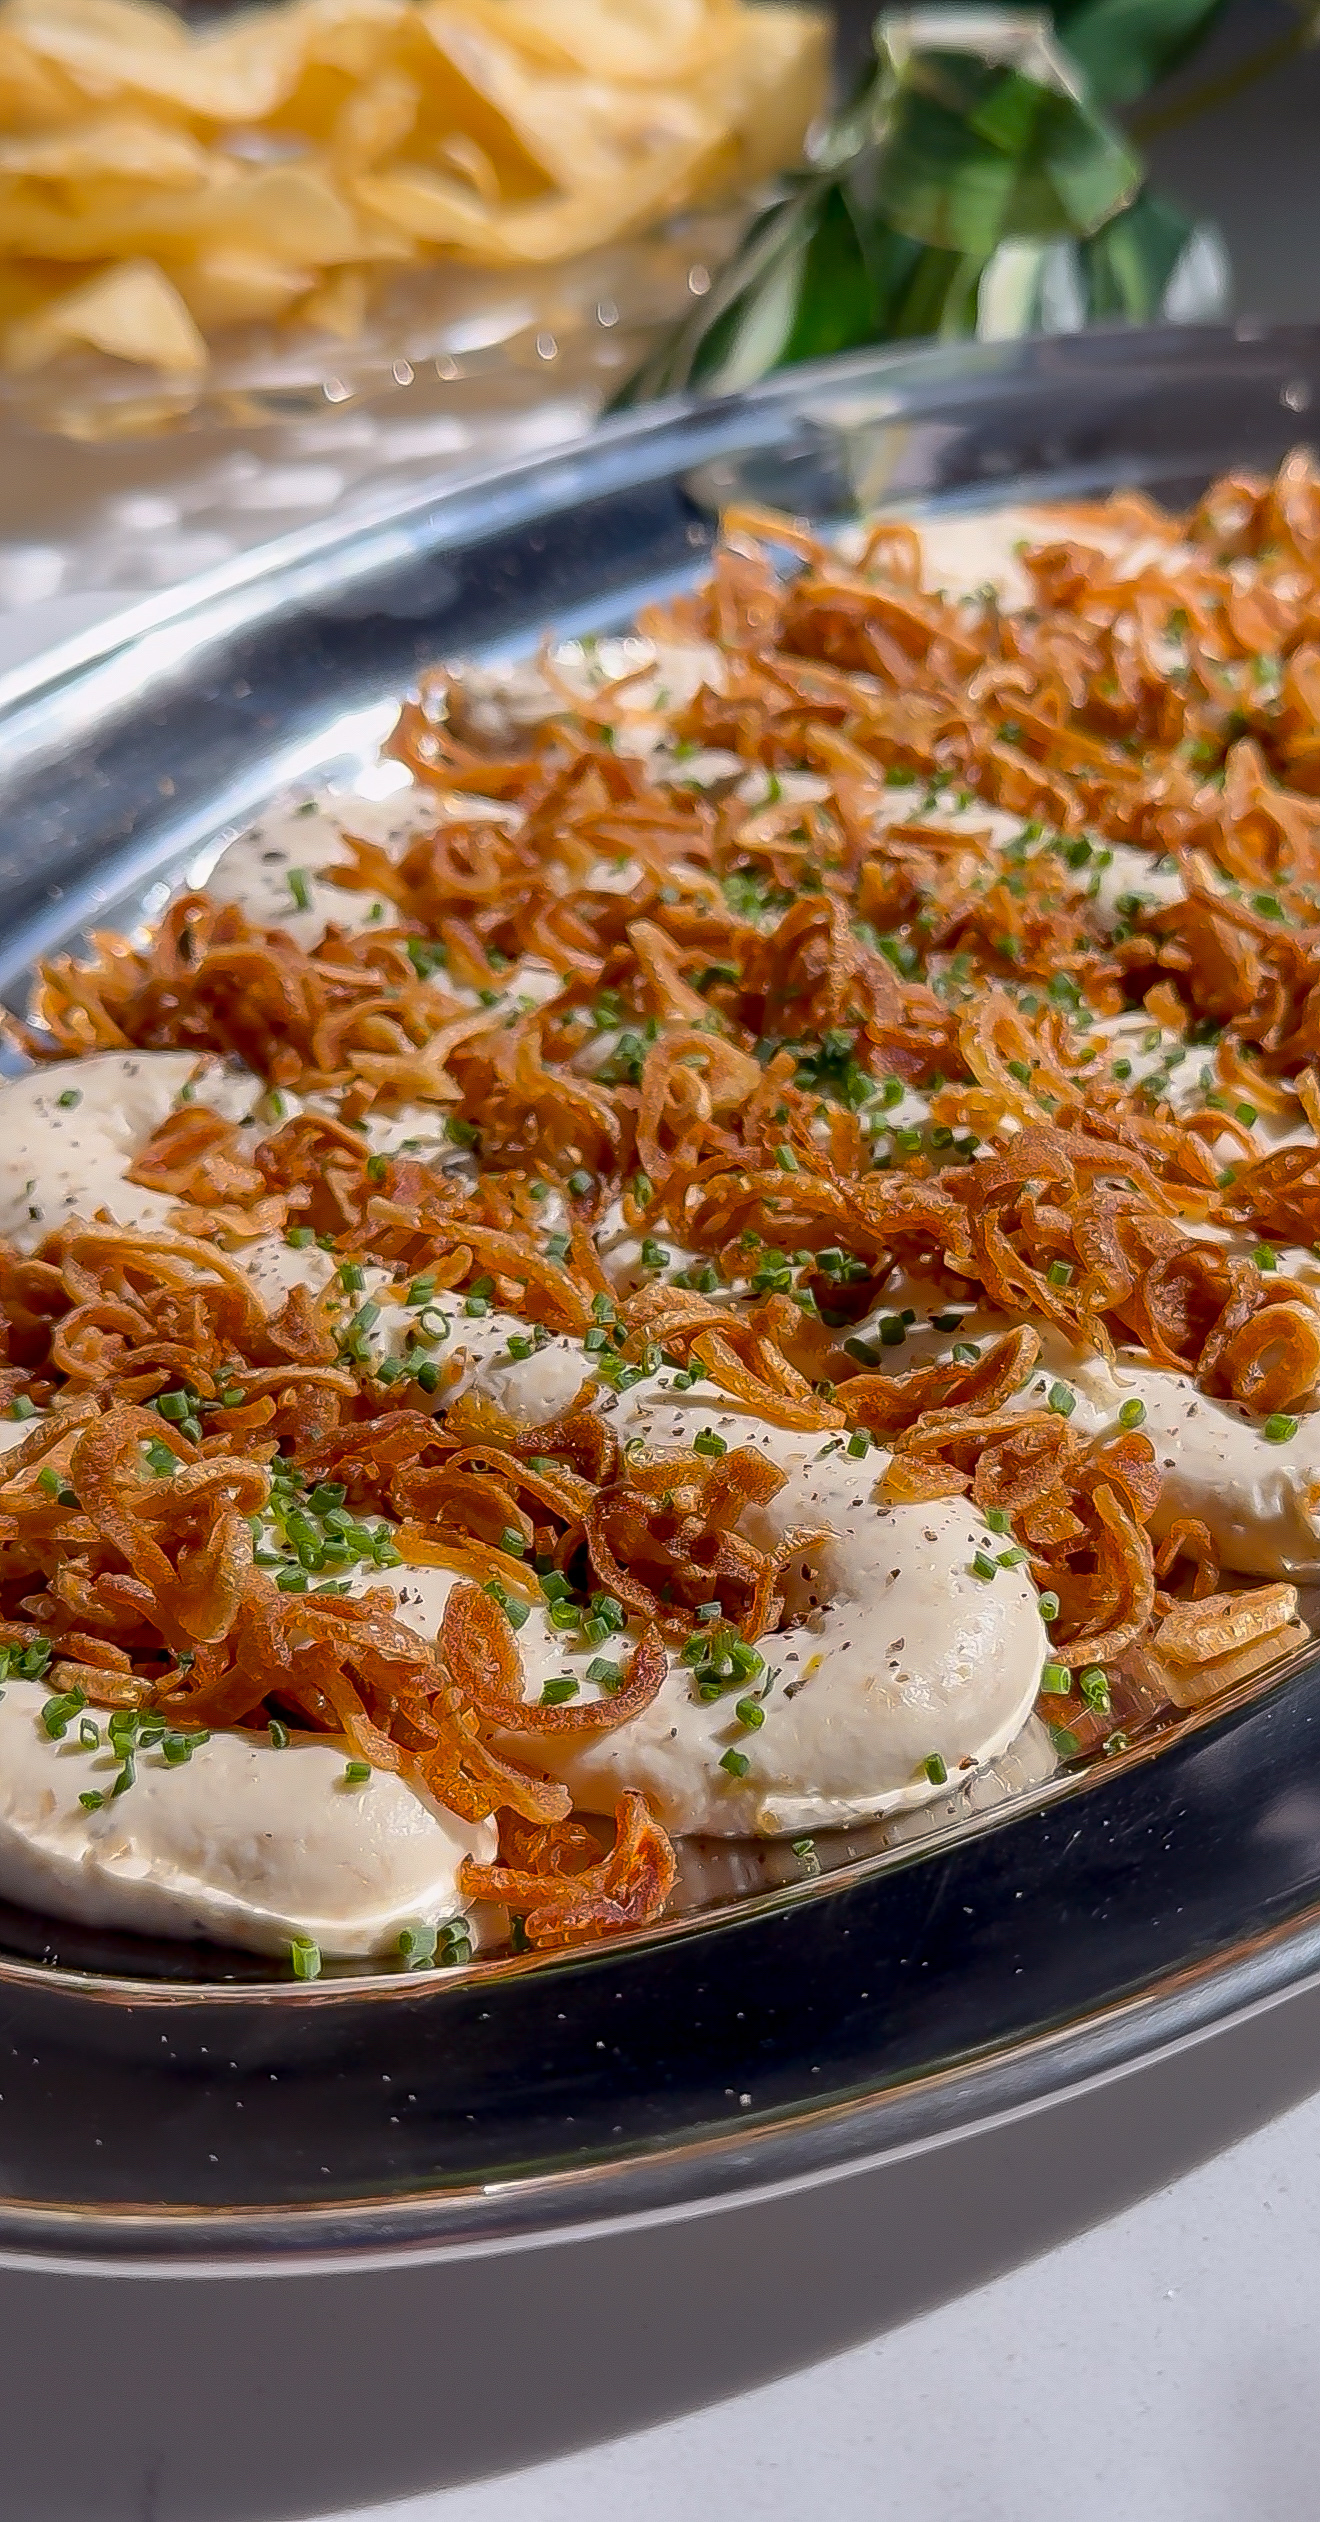
- Unparalleled Flavor Depth: The star of the show, truly caramelized onions, provides a complex sweetness and umami that no powdered packet can replicate. This slow-cooked magic develops flavors that are both rich and nuanced.
- Freshness You Can Taste: Using fresh ingredients means vibrant herbs like chives and parsley burst with flavor, contributing an essential aromatic lift and beautiful color that dried versions simply can't match.
- No Questionable Fillers: You control every ingredient. Say goodbye to artificial flavors, preservatives, and unnecessary additives often found in packaged dips. With homemade, you get pure, wholesome goodness.
- Customizable to Perfection: Want it tangier? Add a splash of lemon juice. Prefer more herbs? Pile them in! Homemade allows for complete personalization to suit your taste or dietary preferences.
- The "Make-Ahead" Advantage: Like a fine wine, this French onion dip only improves with time. Preparing it a day in advance allows the flavors to meld beautifully, making it an ideal choice for stress-free entertaining and reducing last-minute party stress.
The Heart of the Dip: Perfecting Caramelized Onions
The secret to an extraordinary French onion dip lies squarely in the onions. This isn't just sautéing; it's a slow, patient process of transforming humble onions into sweet, golden, intensely flavorful gems. While it requires time, the effort is undeniably worth it.
The Art of Caramelization: A Step-by-Step Guide
Achieving perfectly caramelized onions is the cornerstone of this recipe. This process brings out their natural sugars, creating a depth of flavor that defines a truly great French onion dip.
- Preparation is Key: Begin with sweet onions (like Vidalia or Walla Walla) for the best results, though yellow onions also work wonderfully. Slice them thinly and uniformly to ensure even cooking.
- Start with the Right Fat: In a large, heavy-bottomed sauté pan or Dutch oven, melt a generous amount of butter or a combination of butter and a neutral oil (like olive or avocado oil) over medium heat. The butter adds richness, while oil helps prevent burning.
- The Initial Sauté: Add your sliced onions to the hot pan. Stir them well to coat them in the fat. Let them sit for 2-3 minutes without stirring, allowing a slight sear to develop on one side. This jumpstarts the browning process.
- Low and Slow is the Way: After the initial sear, reduce the heat to low. This is crucial. Caramelization is not a race; it's a marathon. Stir every couple of minutes for the first 30 minutes, ensuring the onions cook evenly and don't stick.
- The Deglazing Dance: As the onions cook down, they'll release their moisture, which will eventually evaporate, leaving behind browned bits (fond) stuck to the bottom of the pan. If the onions start sticking excessively or getting too dark, add a few tablespoons of water or broth. Use a wooden spoon to scrape up all those flavorful fond bits – this is pure flavor being reincorporated into your onions. Repeat this process as needed.
- Patience, Patience: Continue cooking for approximately 45-60 minutes, or even longer, until the onions reach a deep golden-brown color and are wonderfully soft and sweet. They should be significantly reduced in volume. The exact time depends on your heat, pan, and onion quantity. Don't rush it!
- Garlic's Grand Entrance: In the last minute or two of cooking, add minced garlic to the caramelized onions. Sauté just until fragrant, being careful not to burn it, which would introduce a bitter taste.
- Cool and Chop: Once caramelized to perfection, transfer the onions to a small bowl and chill them in the refrigerator. Cooling is essential, as adding hot onions to the dairy base can cause it to break. Once cooled, roughly chop them into smaller, bite-sized pieces. This ensures a delightful texture in every spoonful.
Building the Best French Onion Dip: Creamy Perfection
With your caramelized onions chilled and ready, assembling the dip is the quickest and easiest part. The right base ingredients create that luscious, creamy texture we all crave.
Essential Ingredients for the Creamy Base
- Sour Cream: This is the backbone of your dip, providing tang and creaminess. For the best flavor and luxurious texture, opt for full-fat, organic sour cream. Its richer taste will shine through.
- Mayonnaise: A touch of mayonnaise adds a wonderful freshness, a subtle tang, and an extra layer of velvety smoothness. This is a classic tip that truly elevates the dip. If you're not a mayonnaise fan, you can omit it, but you might miss that subtle brightness. Alternatively, use a high-quality avocado oil mayonnaise for a slightly different flavor profile.
- Fresh Herbs: Finely chopped fresh chives and parsley are non-negotiable. They add vibrant color, an aromatic lift, and a necessary counterpoint to the richness of the onions and dairy. Avoid dried herbs here; their flavor is simply too weak to make an impact.
- Seasoning: A generous pinch of kosher salt and freshly ground black pepper to taste. Remember to start with a little and add more as needed after mixing.
Mixing and Melding
Once all your components are ready, the final step is effortless:
- In a medium-sized mixing bowl, combine the cooled, chopped caramelized onions with the sour cream, mayonnaise, fresh chives, and fresh parsley.
- Stir everything together until thoroughly combined and beautifully creamy.
- Taste and adjust seasoning with salt and pepper as needed.
- For optimal flavor, cover the bowl and refrigerate for at least 2 hours. Ideally, make it a day ahead. This resting period allows the flavors to meld and deepen, transforming a good dip into a truly magnificent one.
Serving Suggestions and Storage
Your homemade French onion dip is now ready to impress! While it's a showstopper on its own, thoughtful serving and proper storage can enhance the experience.
Versatile Serving Options
This dip is incredibly versatile and works for any occasion, from Super Bowl parties to elegant holiday gatherings:
- The Classic Duo: Ruffle-style potato chips are the traditional and arguably perfect companion. Their sturdy texture and salty crunch are made for this creamy dip.
- Healthier Dippers: For a lighter option, serve with an assortment of crisp vegetable sticks. Think carrot sticks, celery stalks, bell pepper strips (various colors), cucumber slices, radishes, or even blanched asparagus.
- Bread & Crackers: Toasted baguette slices, pita bread, or a variety of artisanal crackers also make excellent vehicles for scooping.
- Beyond the Dip Bowl: Don't limit this culinary masterpiece to just dipping! Spread it on burgers or sandwiches for an instant flavor upgrade. Dollop it onto baked potatoes, or use it as a creamy base for wraps. The possibilities are endless.
Storage and Leftovers
If you're lucky enough to have any leftovers (a rare occurrence!), store them in an airtight container in the refrigerator. This French onion dip will stay fresh and delicious for up to a week. In fact, many find its flavor even better on the second and third days as the ingredients continue to marry. But be warned: its irresistible nature means it rarely lasts that long!
Conclusion
Creating your own caramelized French onion dip is a rewarding culinary journey that culminates in an appetizer far superior to any store-bought alternative. By investing a little time and care into the caramelization process and using fresh, quality ingredients, you unlock a depth of flavor that will make this recipe your go-to signature party dish. So, gather your ingredients, embrace the low-and-slow method, and prepare to delight your guests with a dip that’s truly masterful in its flavor and sure to be devoured in record time.
